Windows Subsystem for Linux (WSL) is a compatibility layer for running Linux binary executables (in ELF format) natively on Windows 10 and Windows Server 2019.
1 Install Windows Subsystem for Linux
Before installing any Linux distros for WSL, you must ensure that the “Windows Subsystem for Linux” optional feature is enabled.
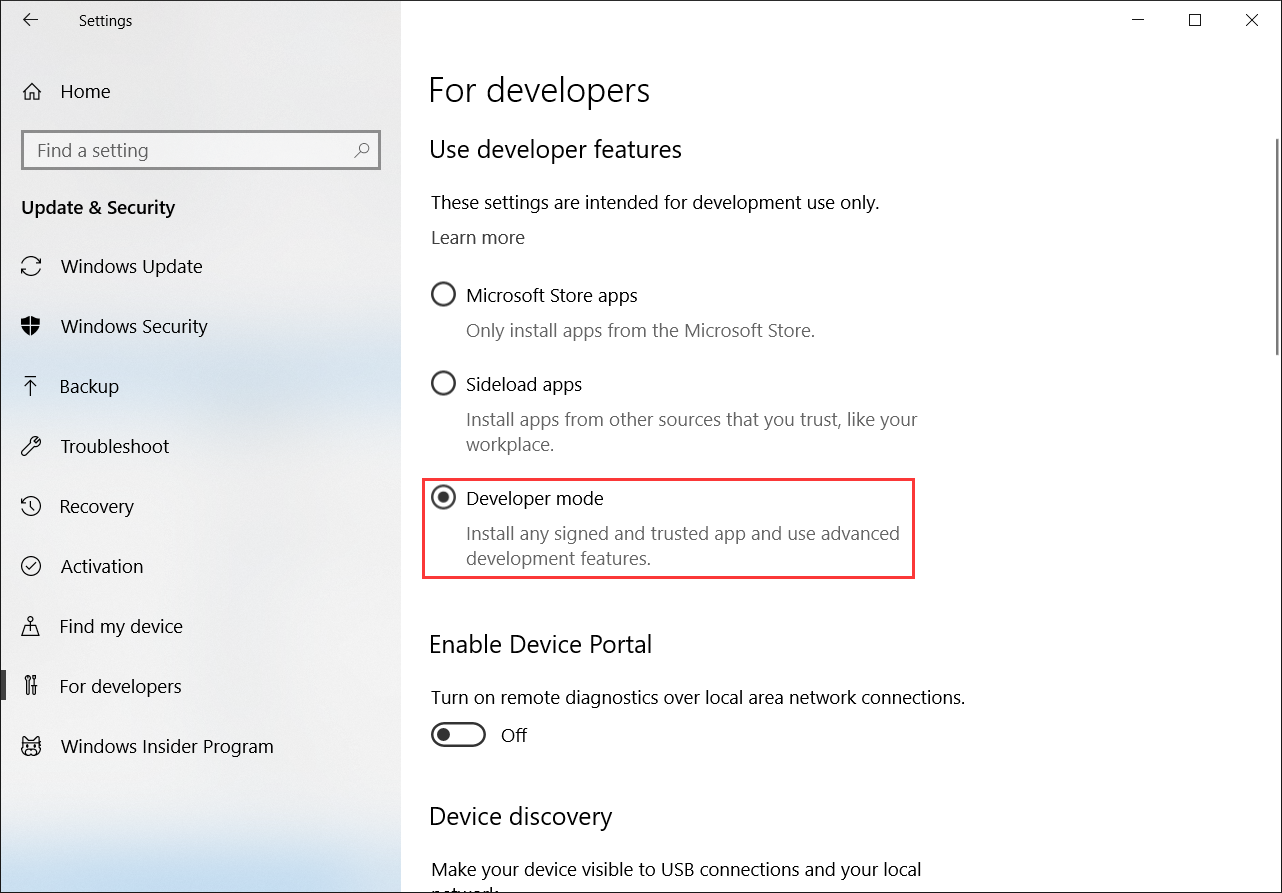
In Windows Settings > Update & Security > For developers, select “Developer mode”. Reboot your PC after all reletive features installed.
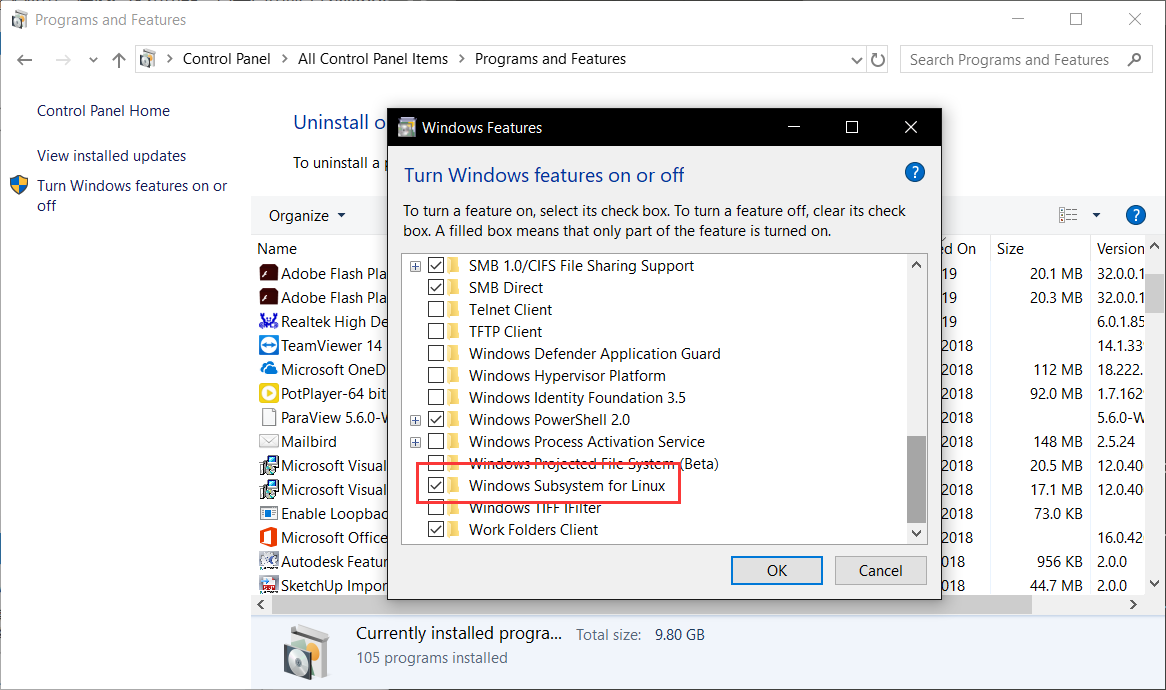
Then in Control Panel > Programs and Features > Turn Windows features on or off, enable “Windows Subsystem for Linux”.
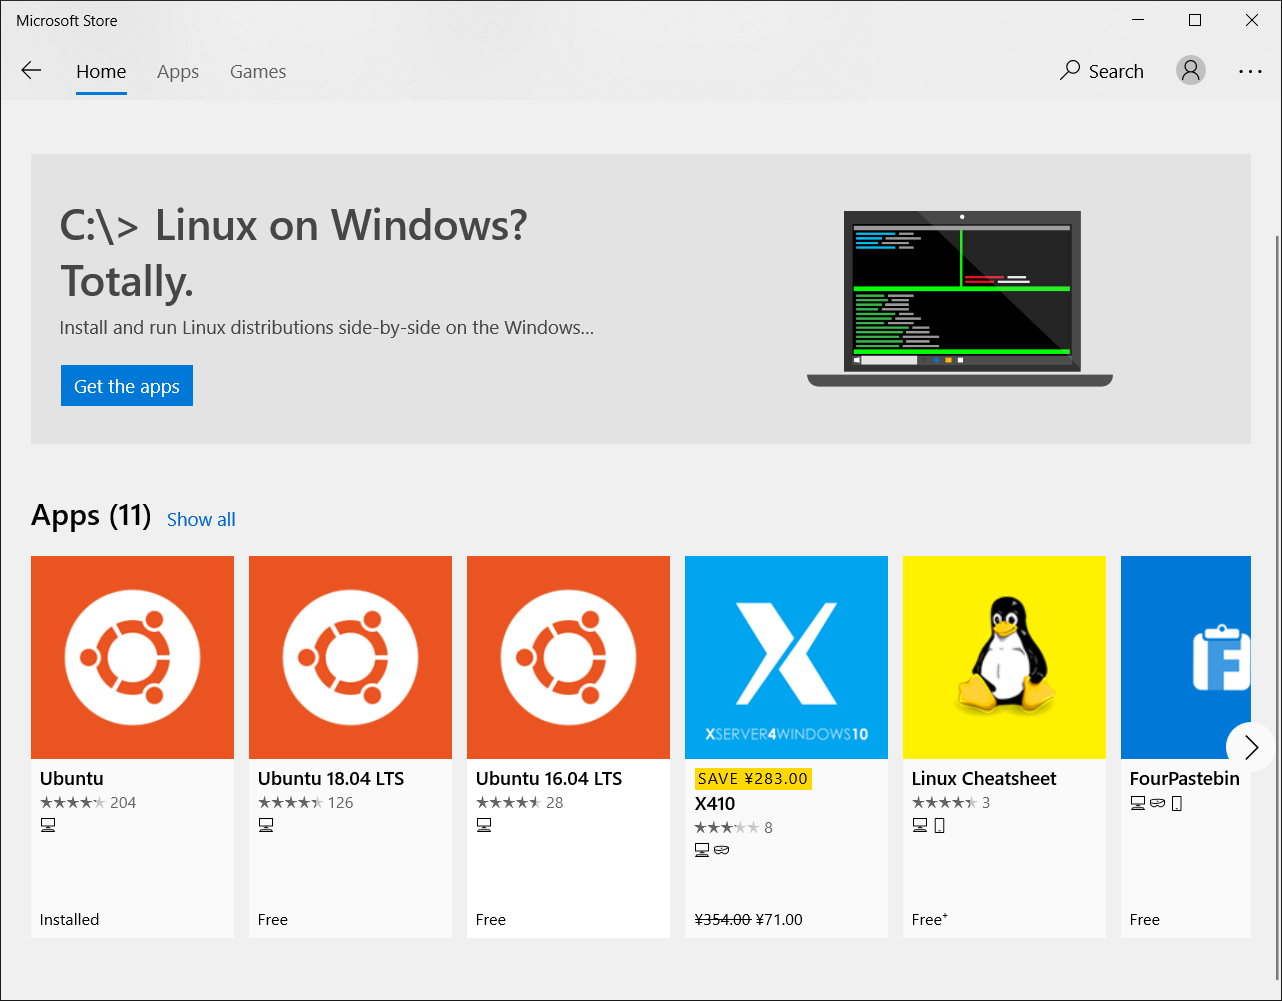
Open the Microsoft Store and choose your favorite Linux distribution, where I select Ubuntu 16.04 LTS.
Run “bash” or “Ubuntu”, you will enter username and password for the subsystem and finish installation.
2 Configure GUI for Subsystem
Download and install VcXsrv for Windows.
In Ubuntu terminal, type following commands to install Ubuntu desktop management. It may take a long time.
sudo apt-get update && sudo apt-get upgrade
echo "y"|sudo apt-get install ubuntu-desktop unity compizconfig-settings-manager
dpkg-reconfigure dbus && service dbus restart
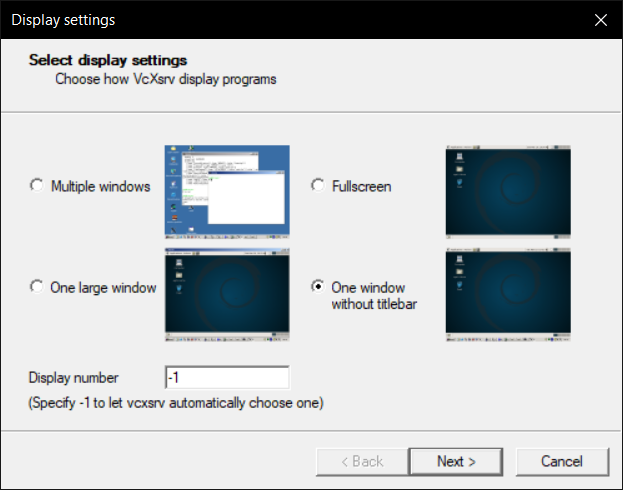
Run “XLaunch”, pick “One window without titlebar”. Click “Next”, other settings remain as default. In the last step, you can save configuration as “config.xlaunch”. You can then double-click on “config.xlaunch” to run “XLaunch” with the same settings.
Add these lines to /etc/profile.
export DISPLAY=localhost:0
Reload profile with linux terminal commands:
source /etc/profile
locale-gen
Then,
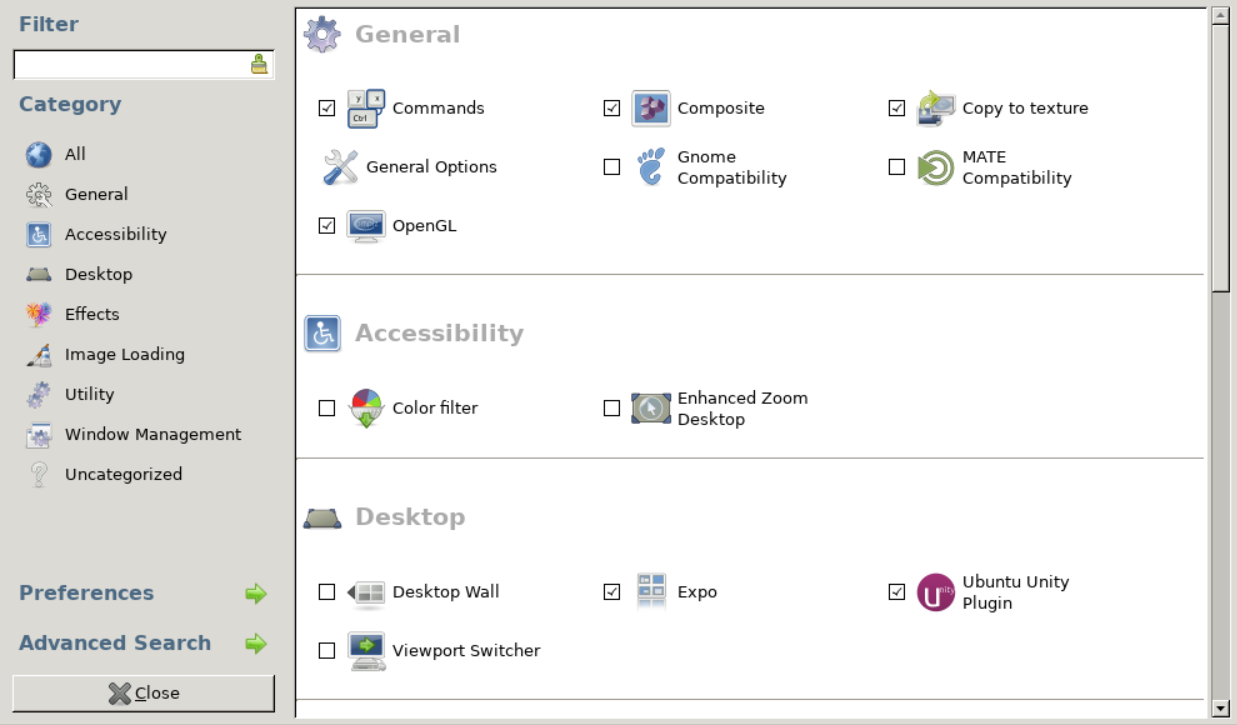
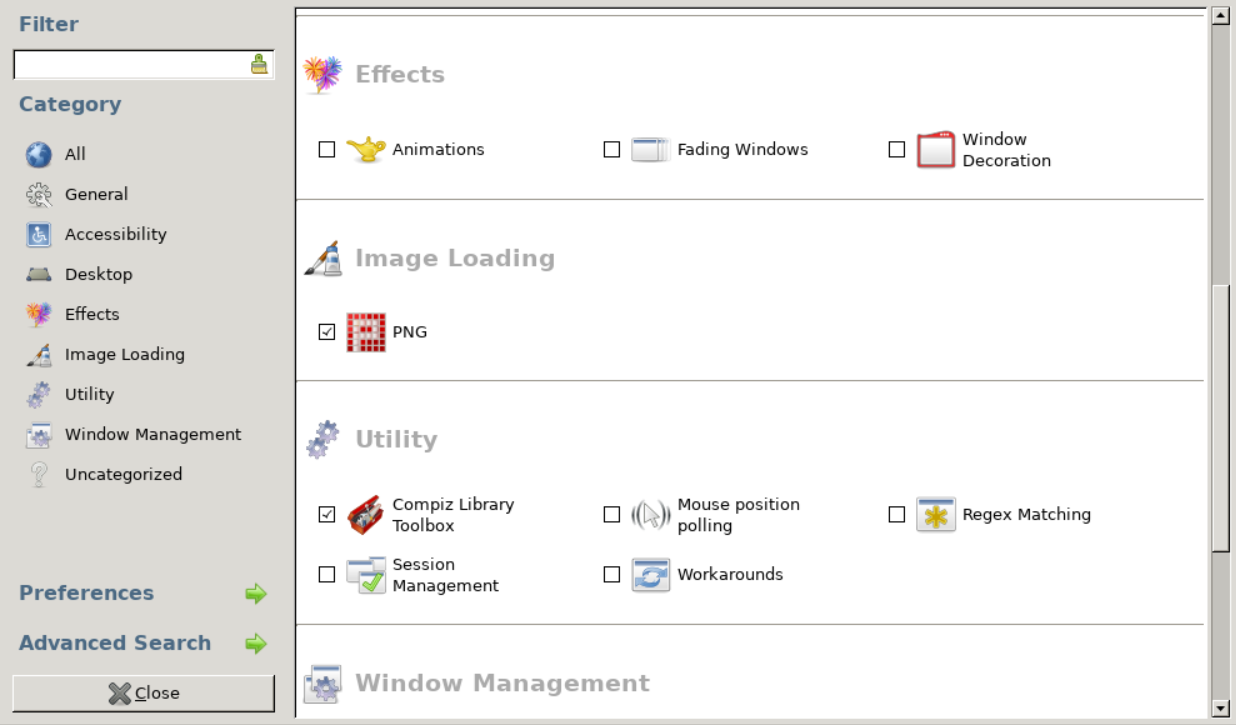
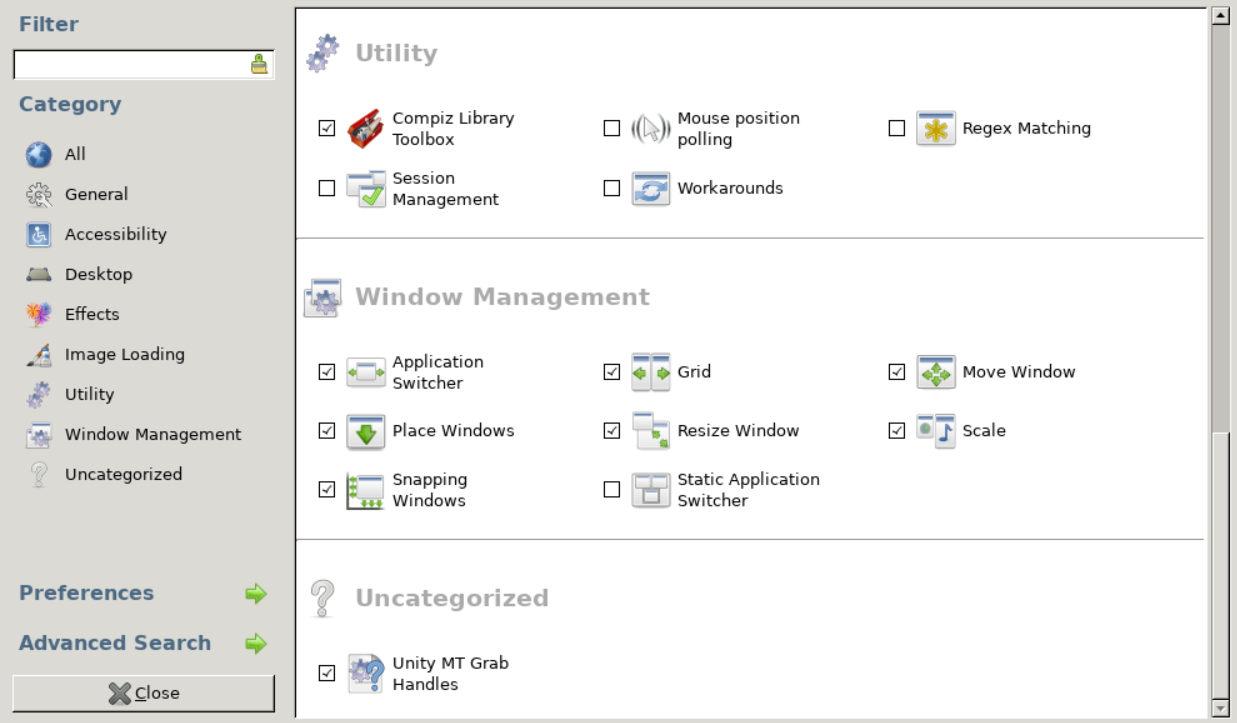
sudo ccsm
Now configure desktop environment in VcXsrv, as shown below.
Finally,
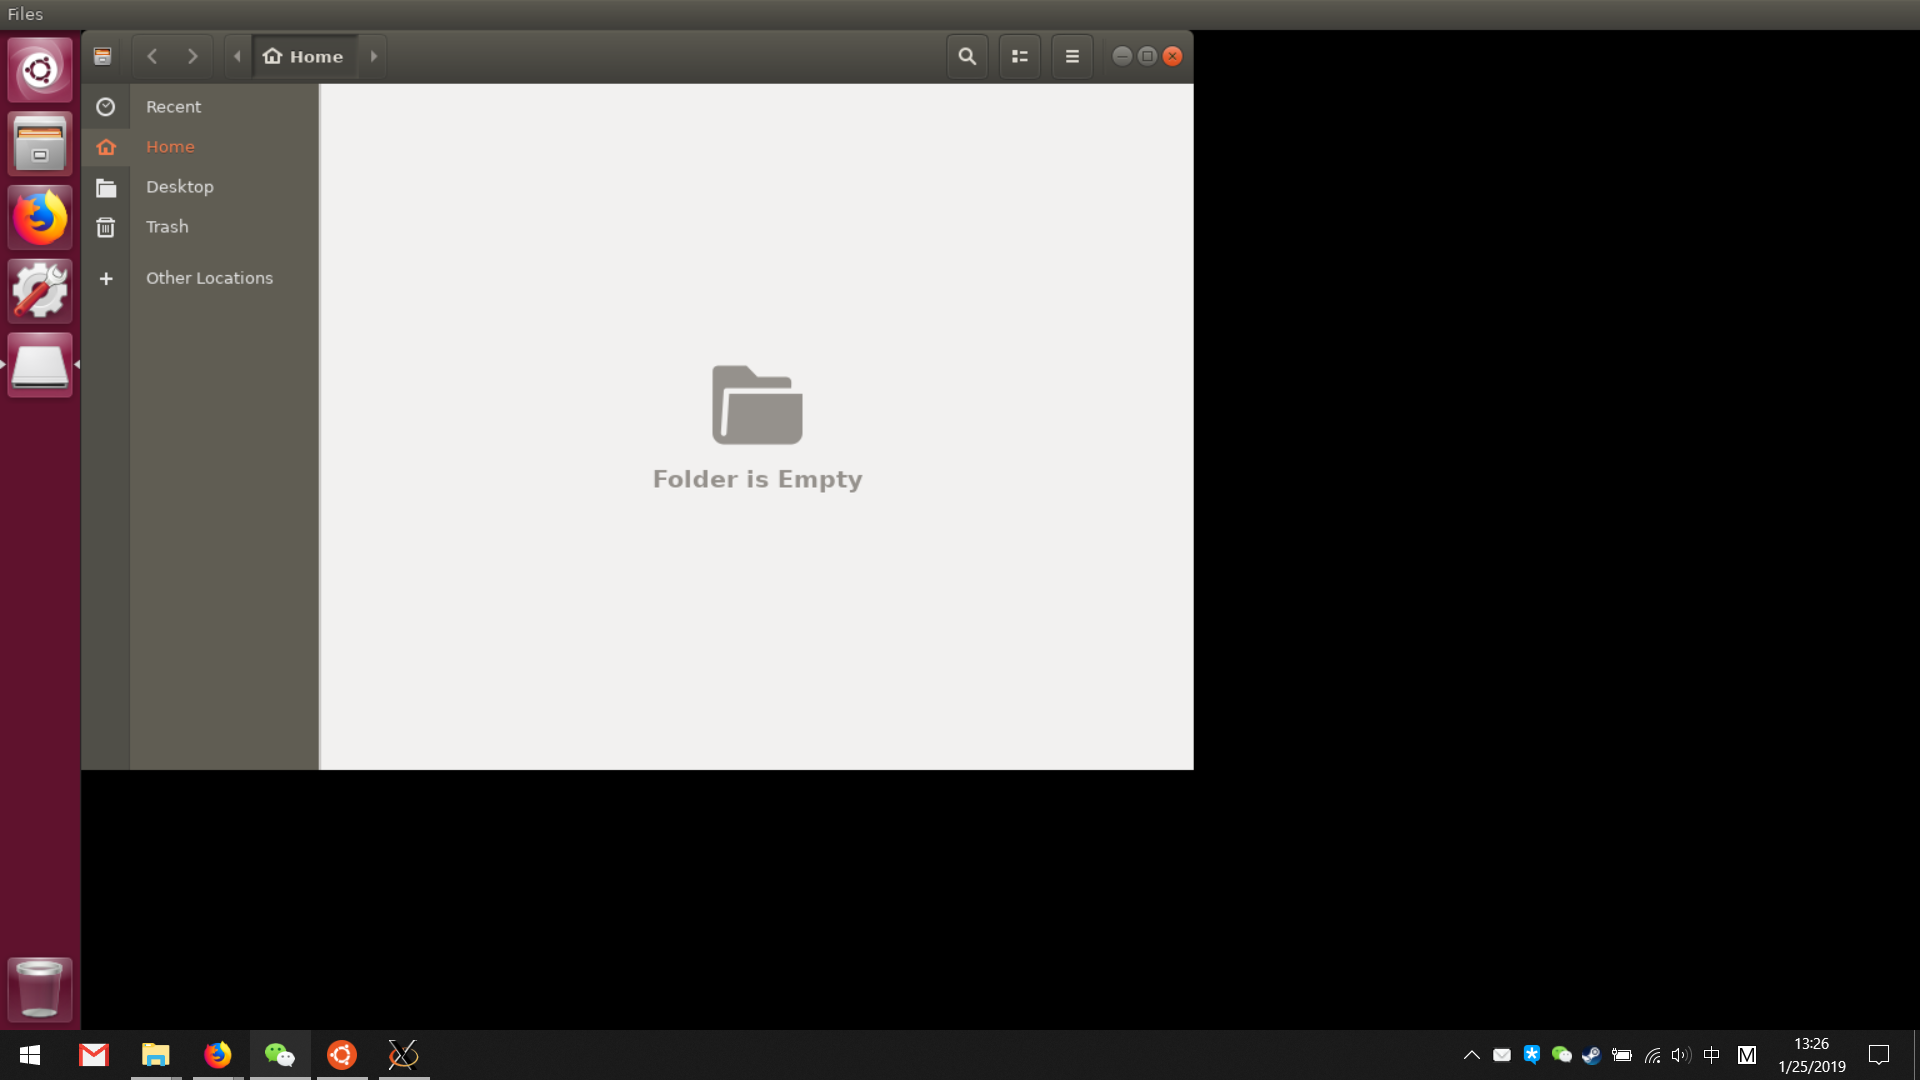
sudo compiz
3 Create Desktop Shortcut
Scipt for quick start: ubuntu_gui.bat.
Along with the icon of Ubuntu: ubuntu_logo.ico.
Download and move them in %VcXsrv%, and create a desktop shortcut for ubuntu_gui.bat.
Enjoy!